Technical Resources
Workshop manuals, parts diagrams, and expert articles for Porsche 356 carburetor maintenance.
Parts Diagrams · Solex Manual · Injection Vials · Duane Spencer · Jack Staggs
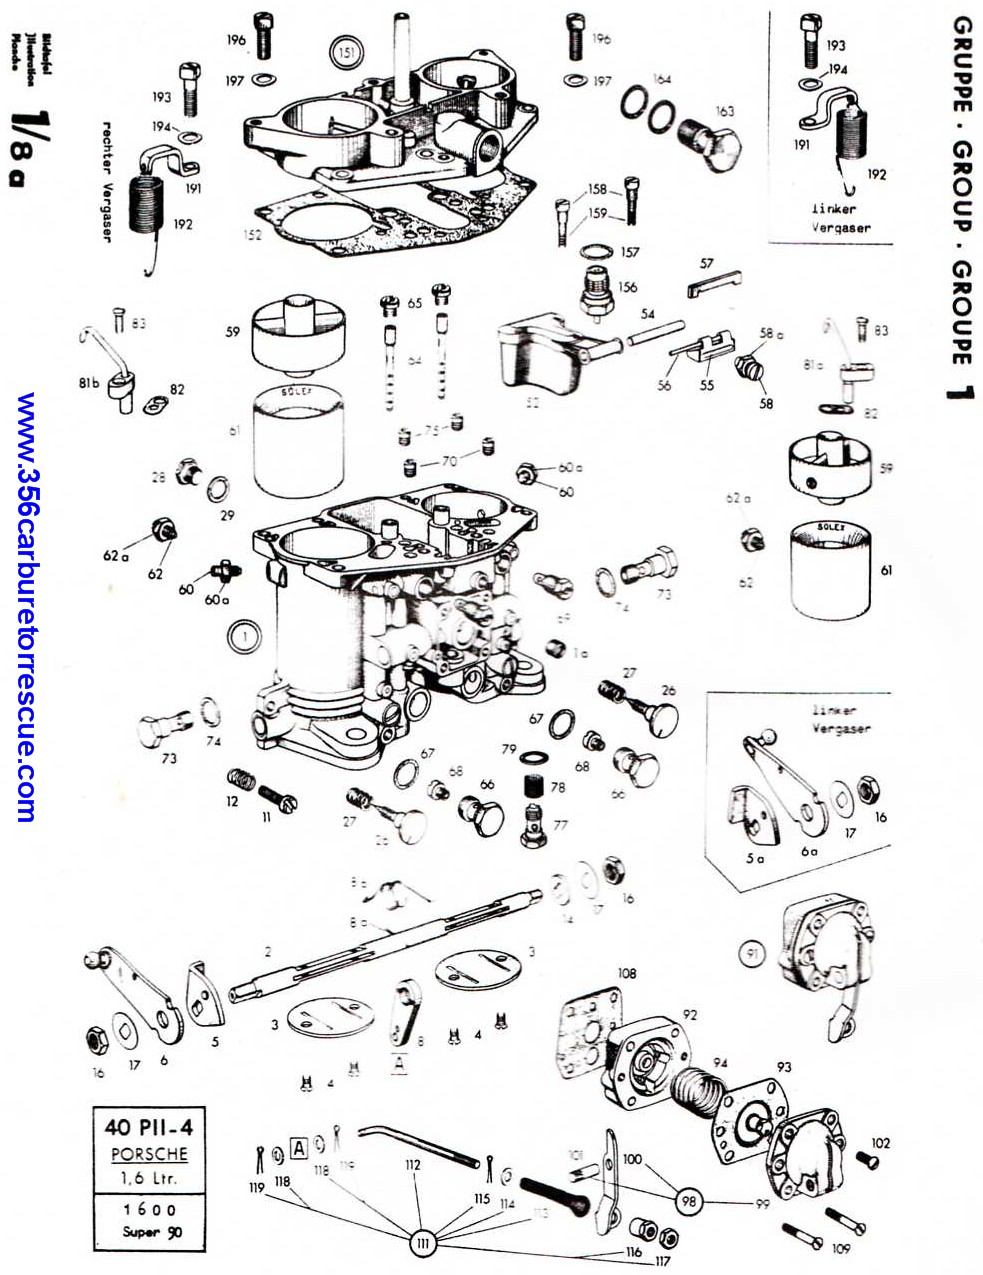
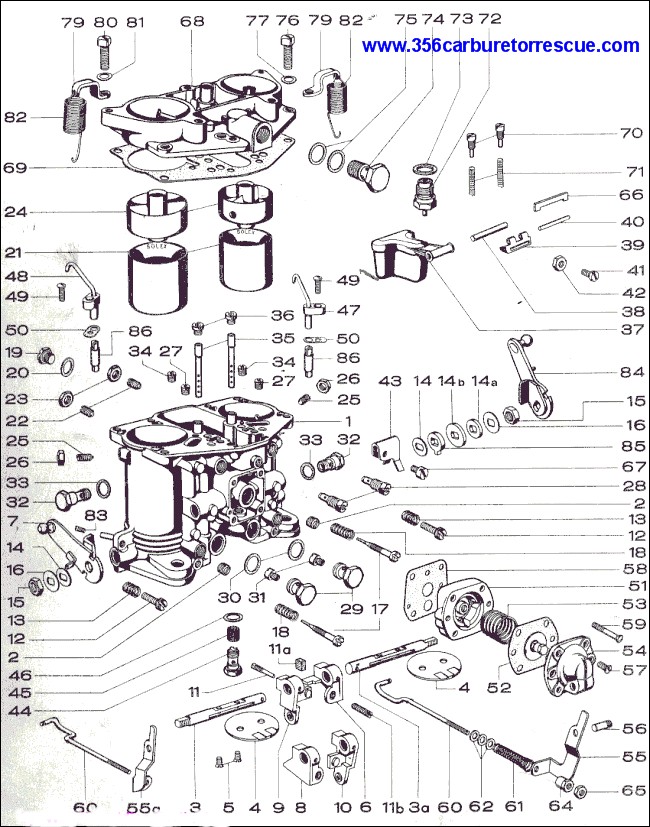
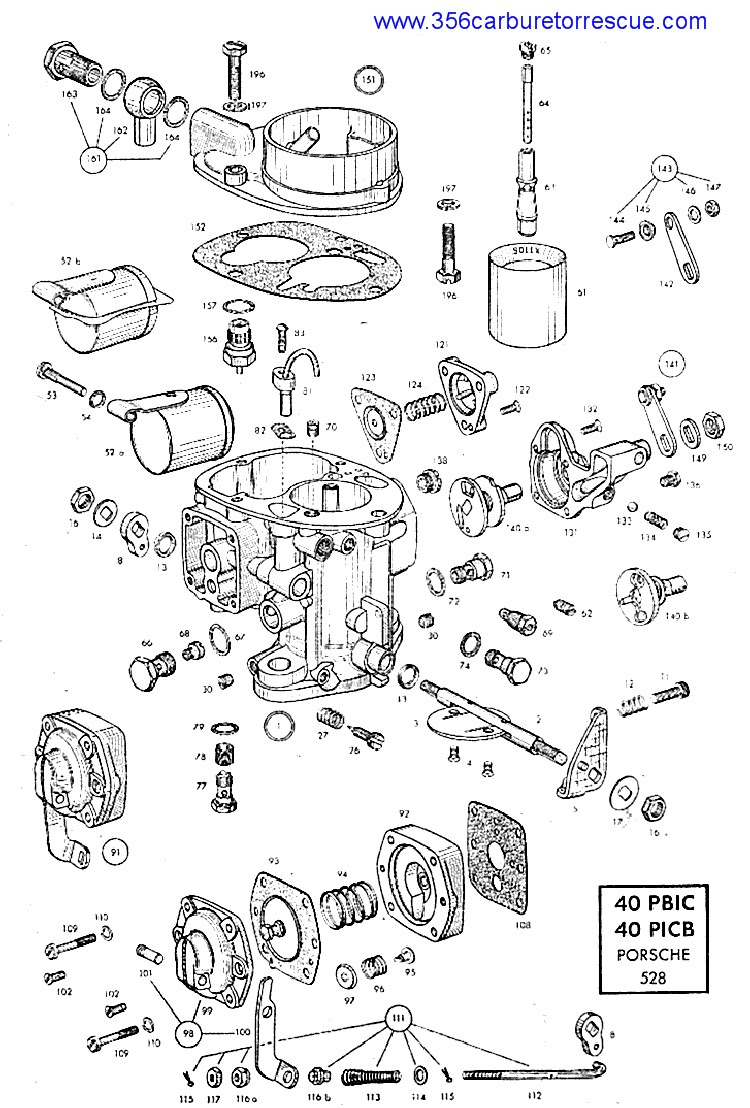
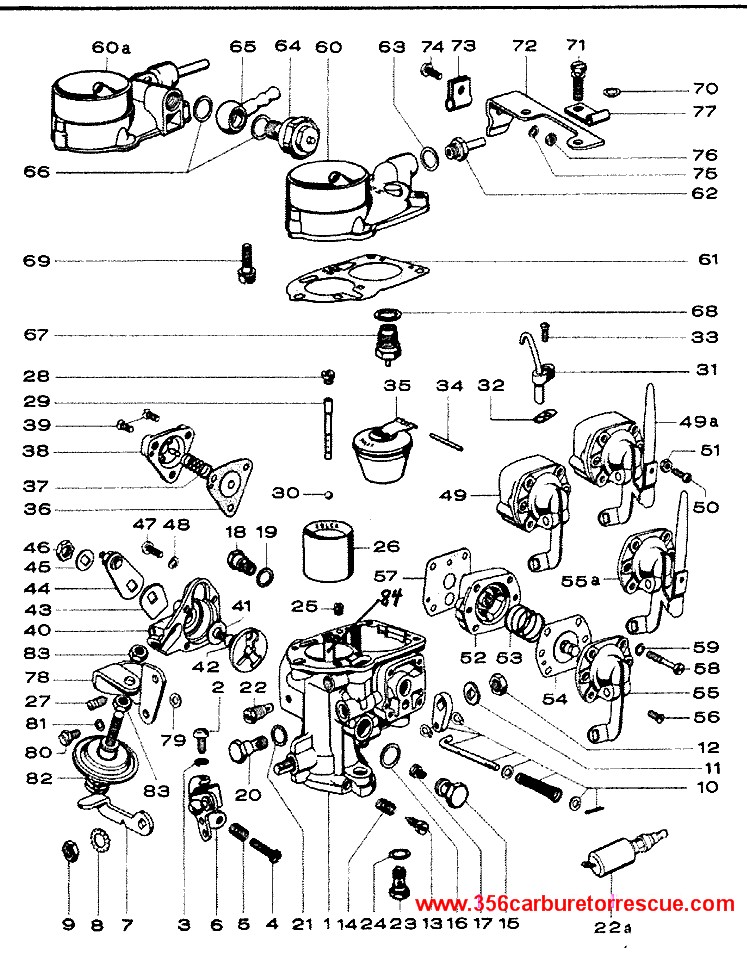
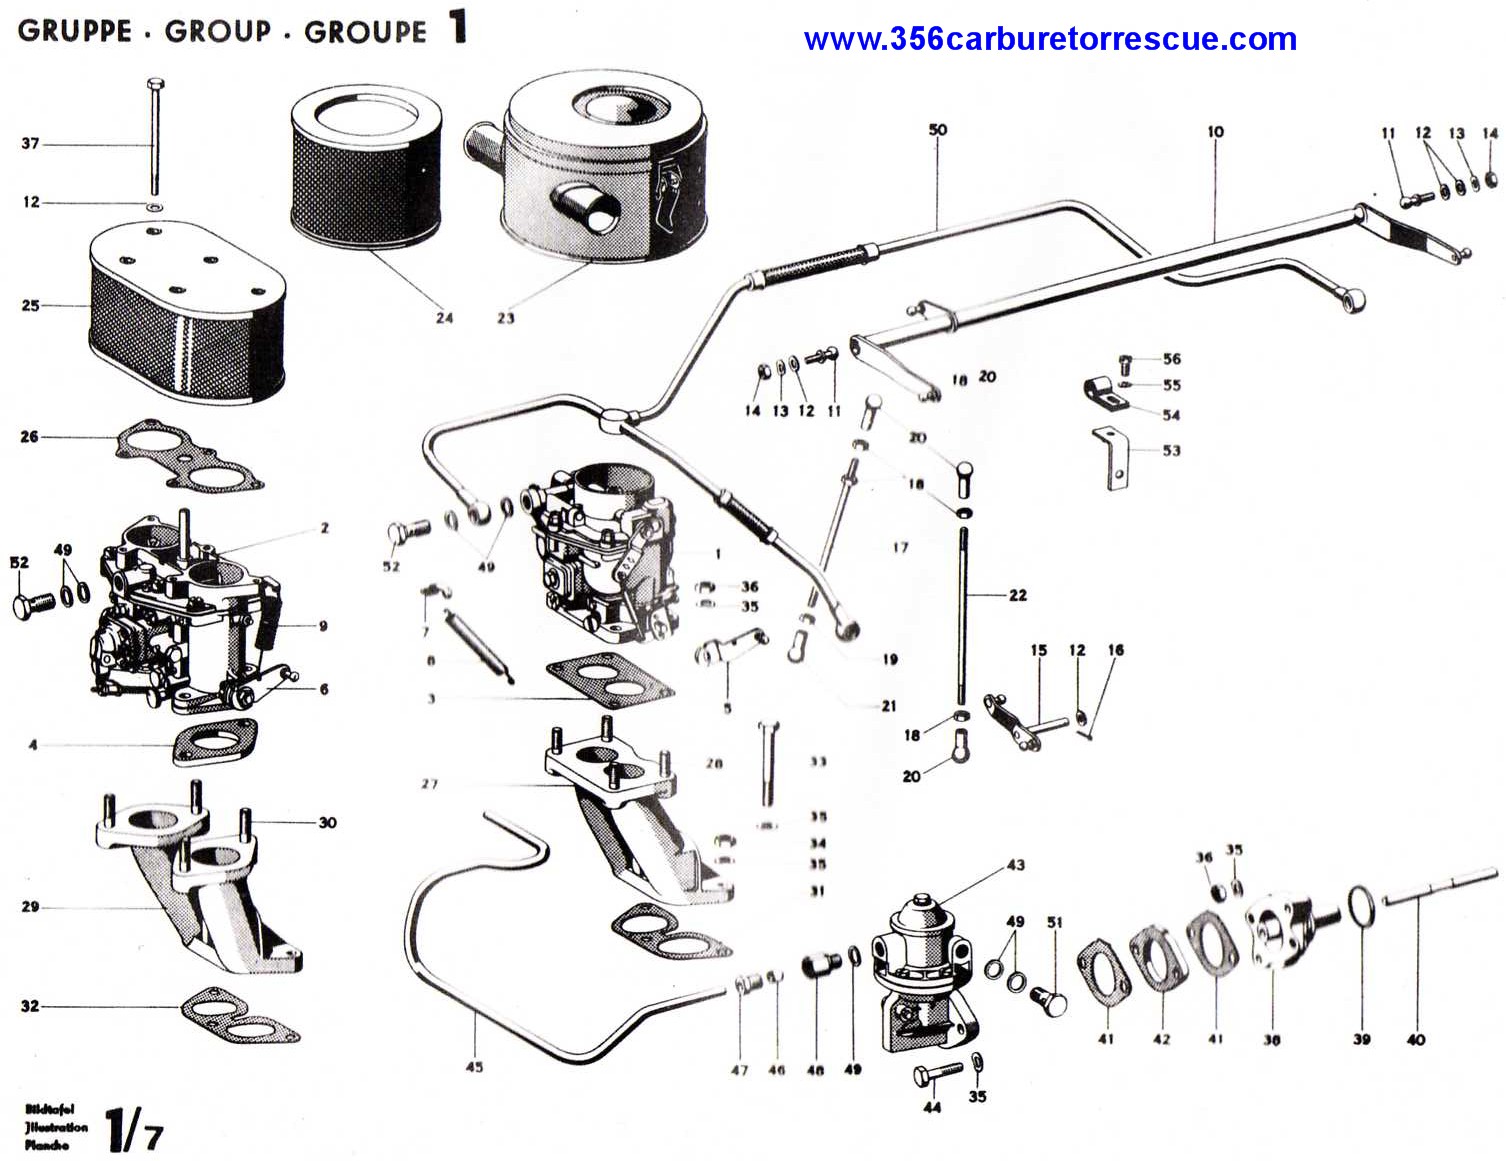
Parts Diagrams
Exploded parts views from the Porsche workshop manual. Use these diagrams for ordering parts or understanding how your carburetors go together. For Solex parts orders, use the solid shaft diagram part numbers (use the split shaft diagram only for parts unique to that carburetor).
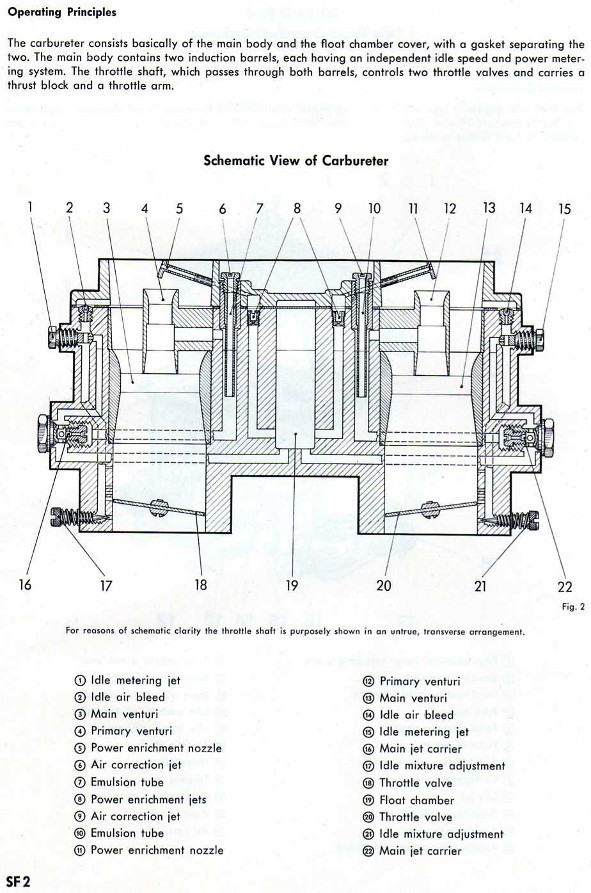
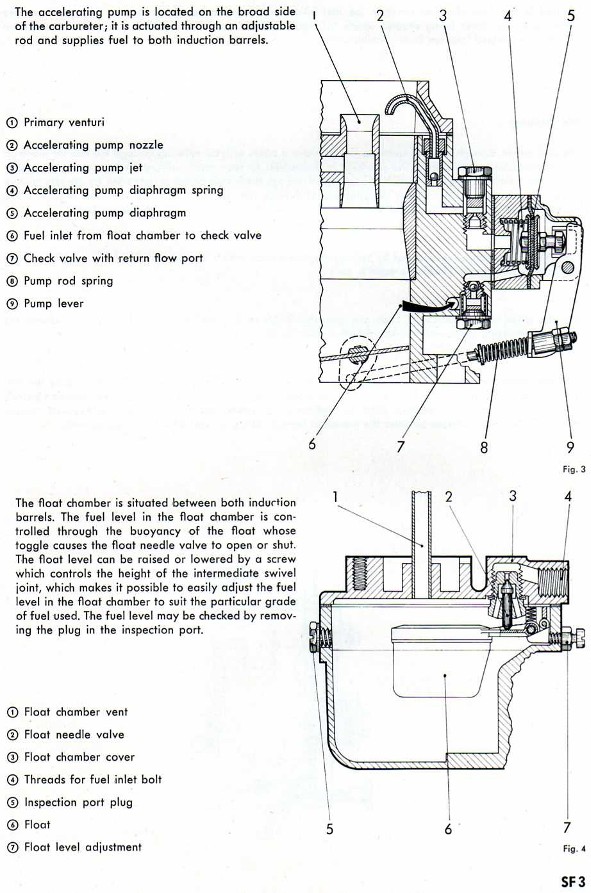
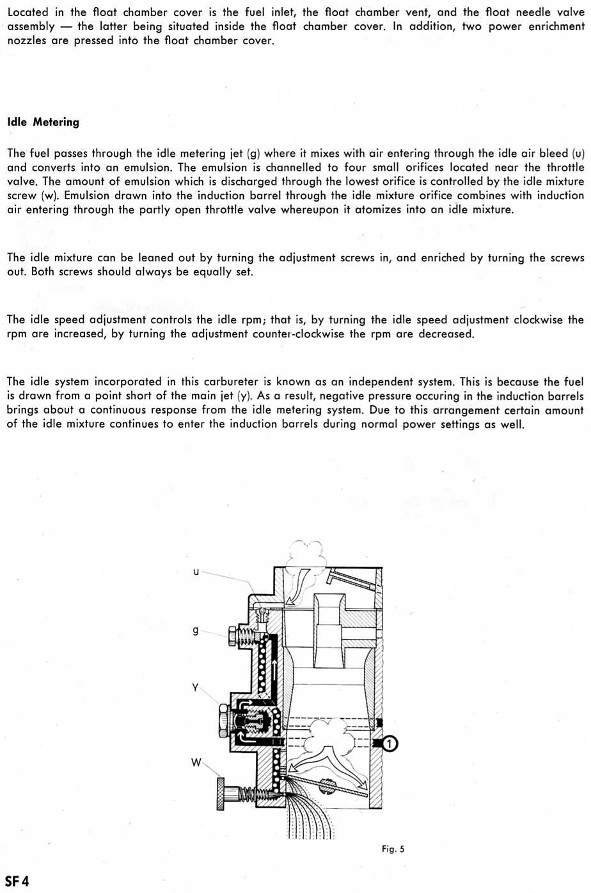
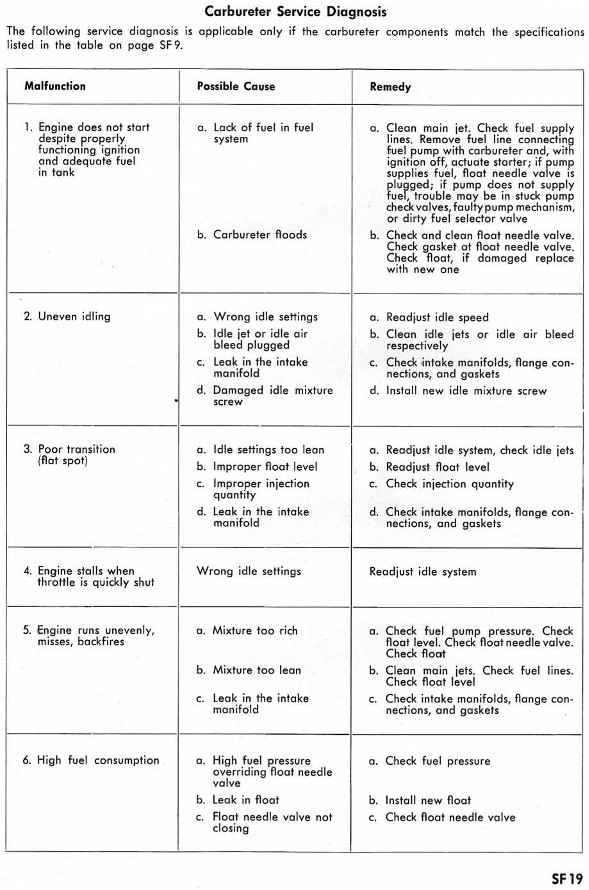
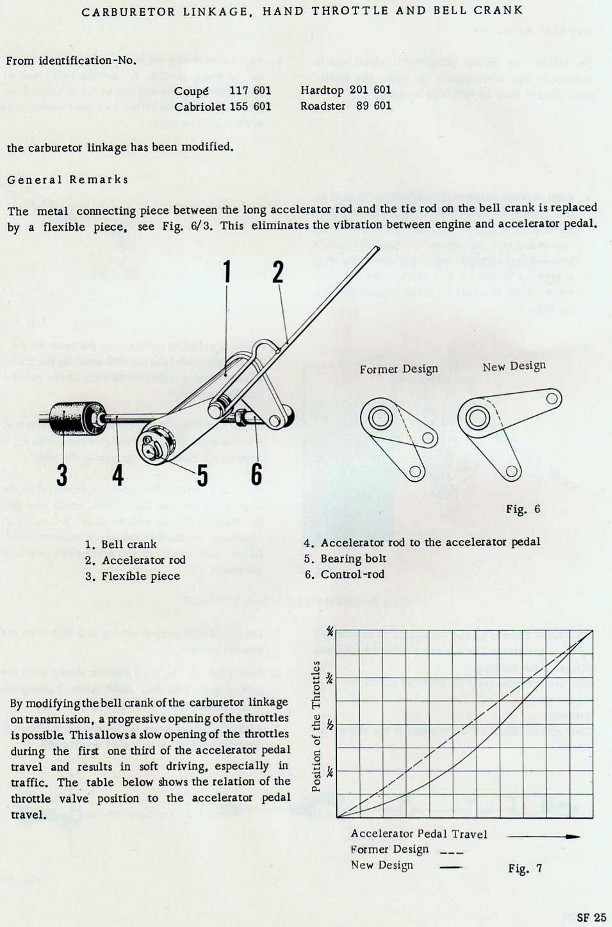
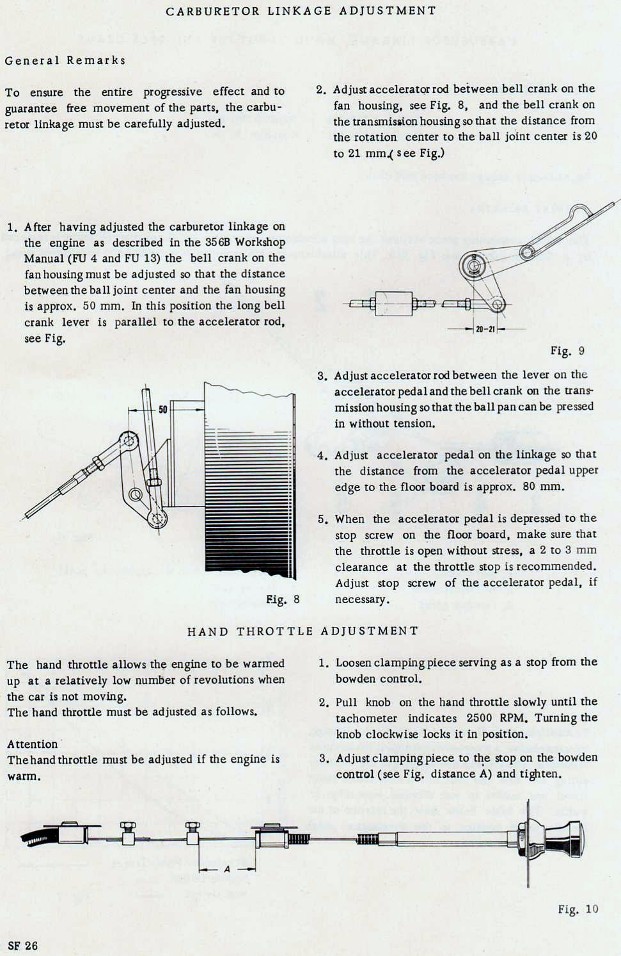
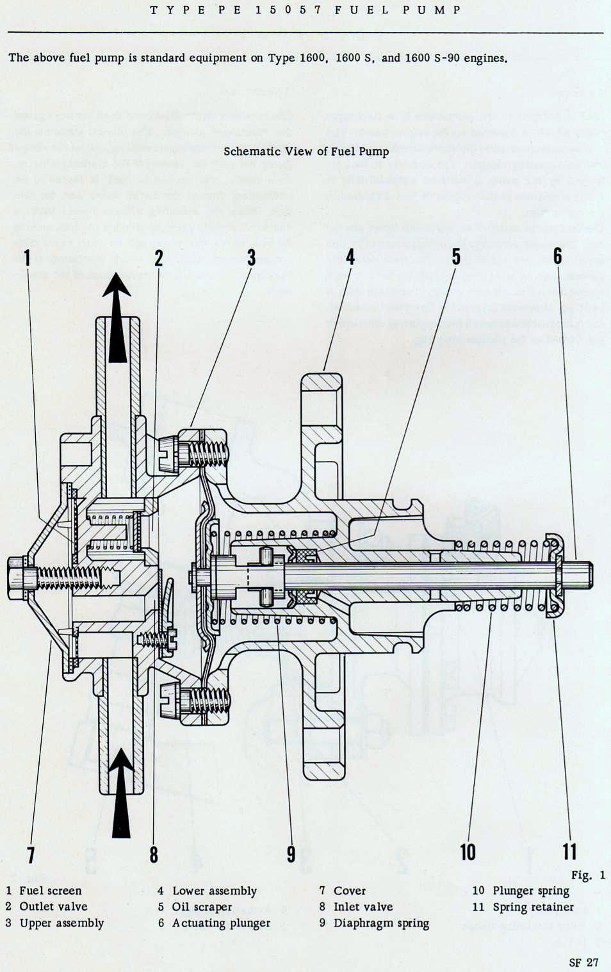
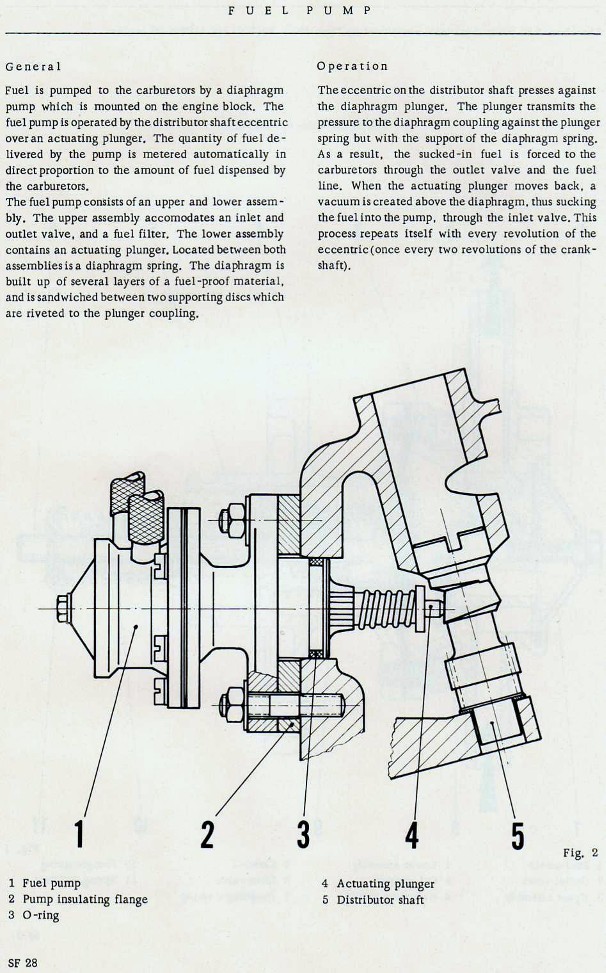
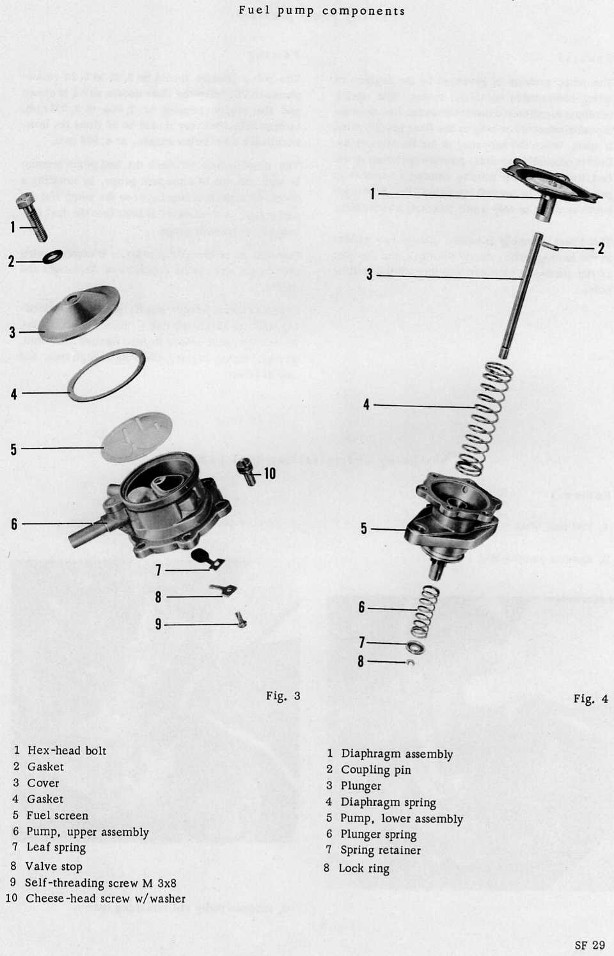
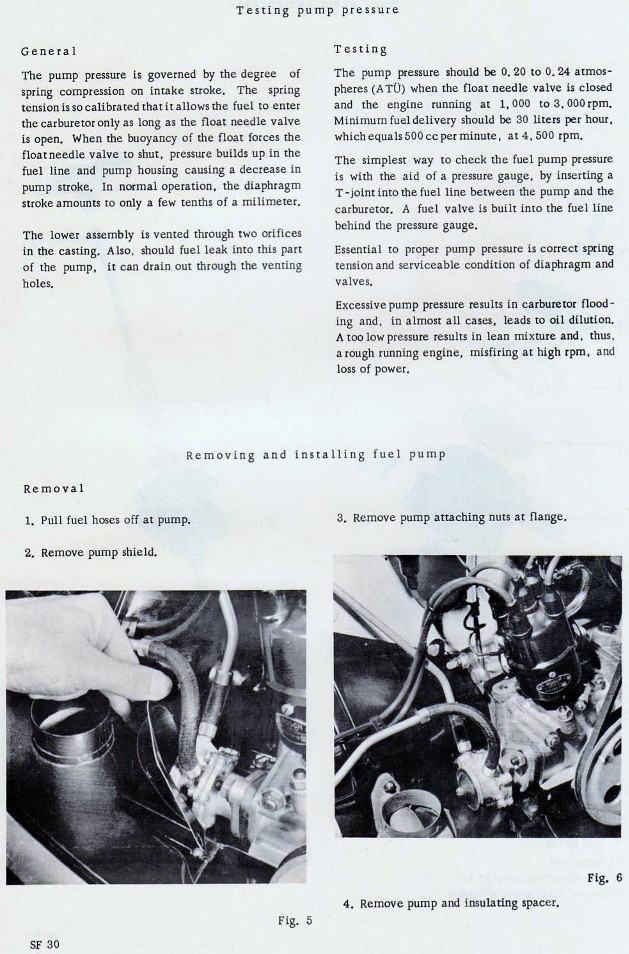
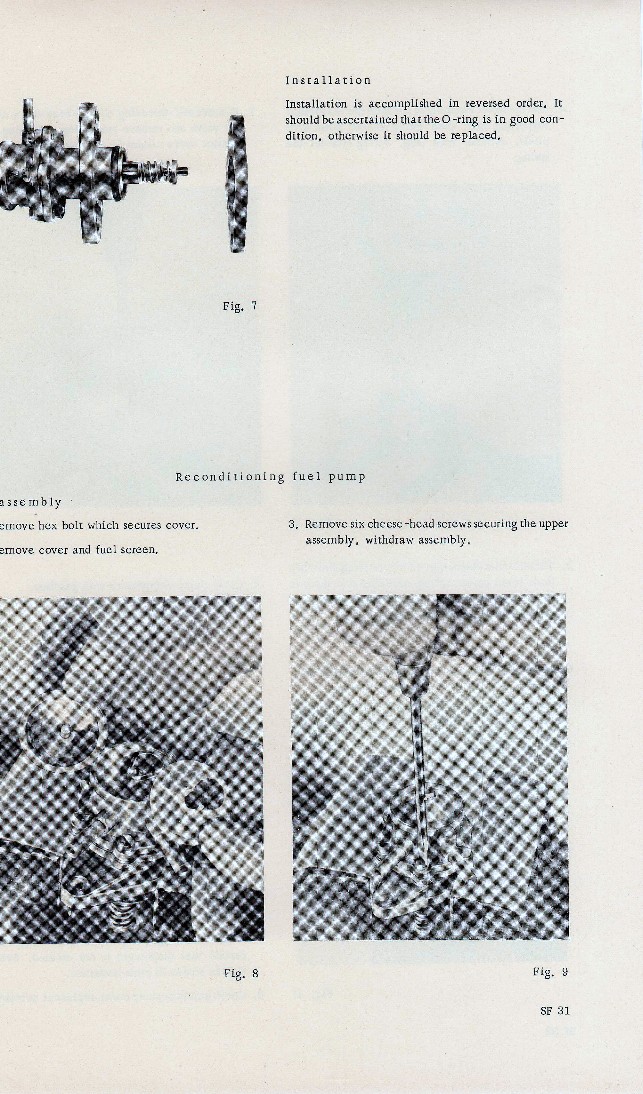
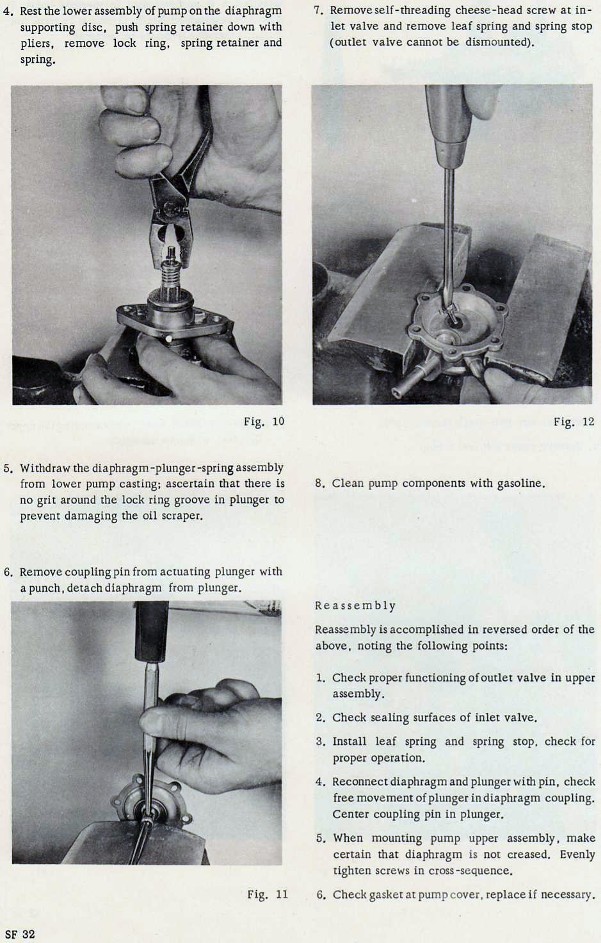
Solex Workshop Manual Pages
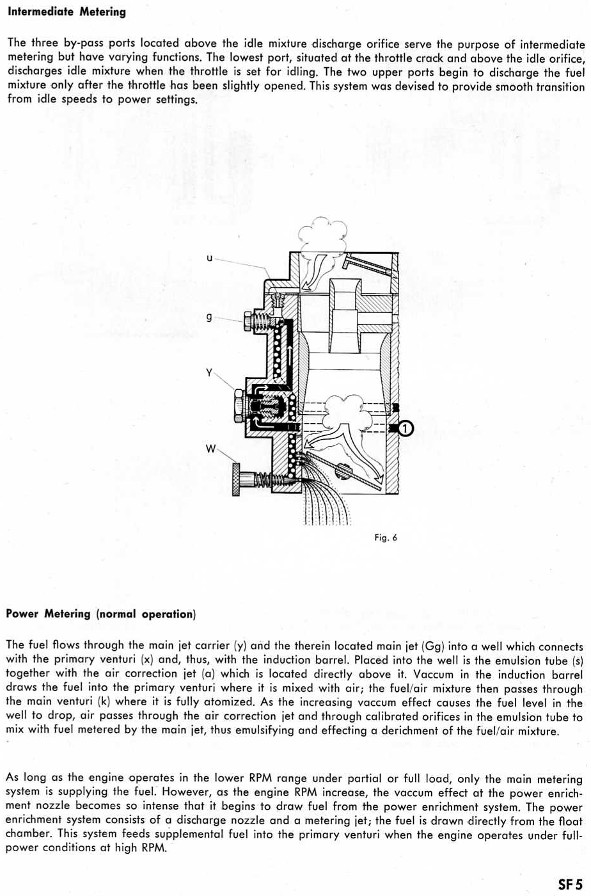
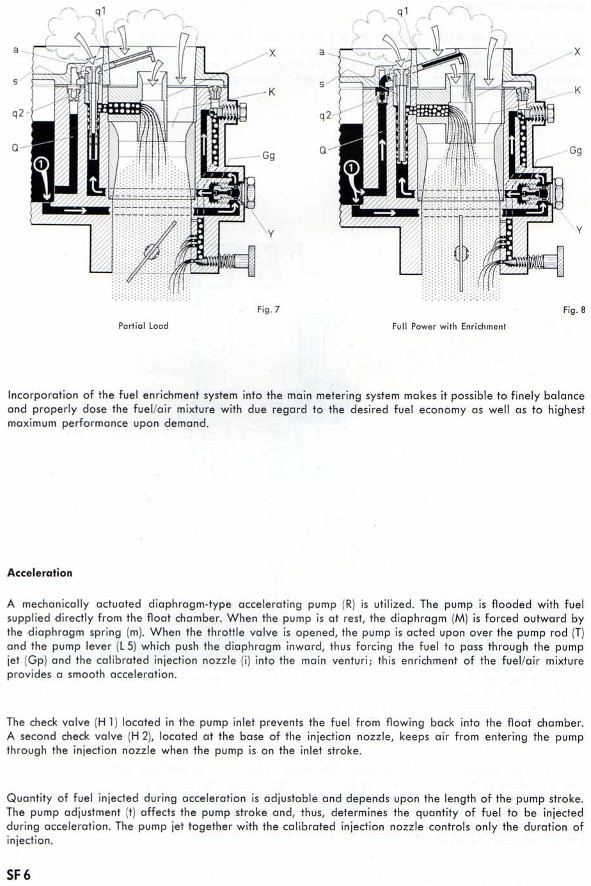
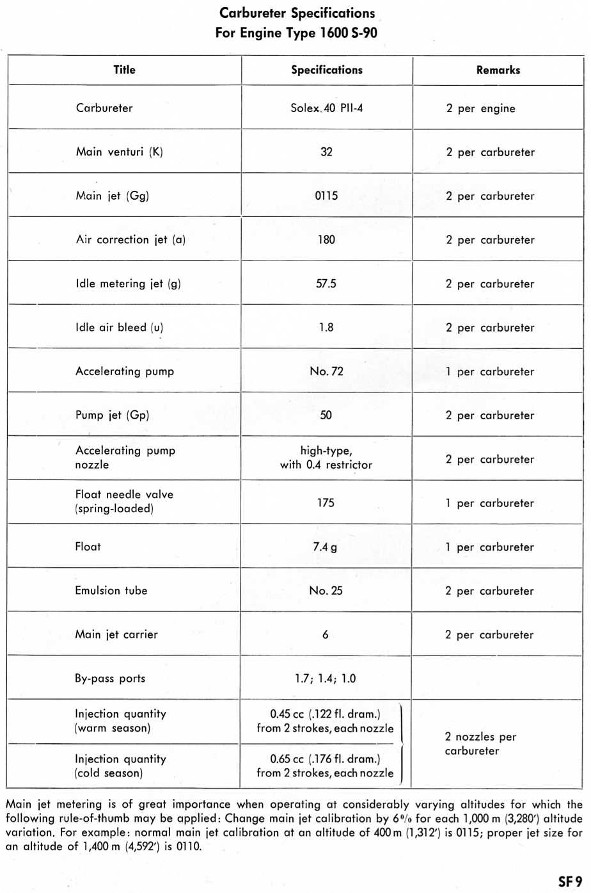
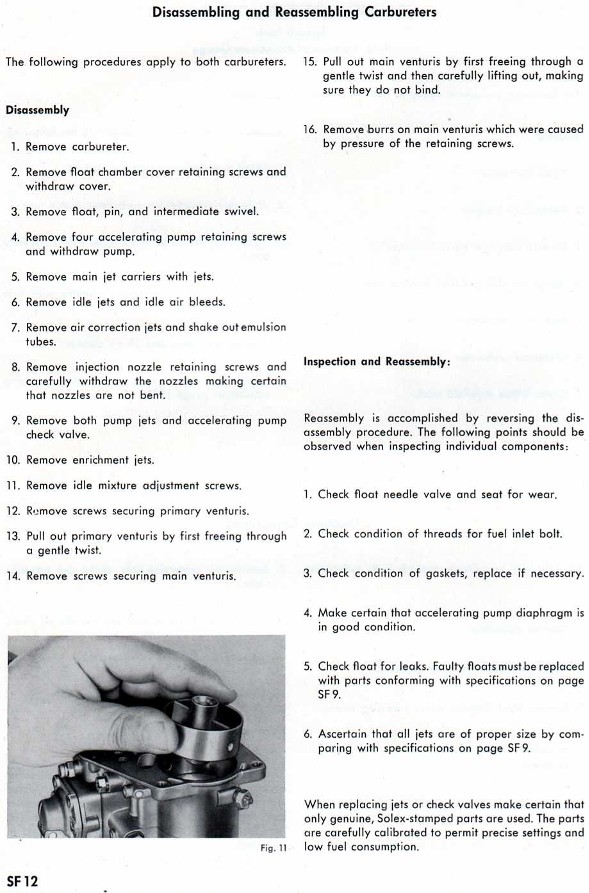
Pages from the Porsche 356 Workshop Manual covering Solex carburetors and the fuel system. Click any image to view at full size.


Injector Measurement Vials

Why Maintenance Matters
All mechanical parts, including carburetors, need maintenance. Eventually you will have driven 10,000, 25,000, or more miles. Even if you don't put a lot of miles on your engine every year, shafts, springs, etc. should be checked for wear, and moving parts lubricated. If you leave gasoline sitting in your carbs for long periods of time, the gunk it leaves behind as it evaporates will clog jets, cause your floats to stick, gum up moving parts, and seal off the smaller passageways. It will also degrade seals and gaskets. On the other hand, carbs run dry and left for long periods of time will see the gaskets and seals dry out and crack. Leaking seals can mean gasoline leaking into your engine. Leaking gasoline eventually resolves itself — as FIRE!
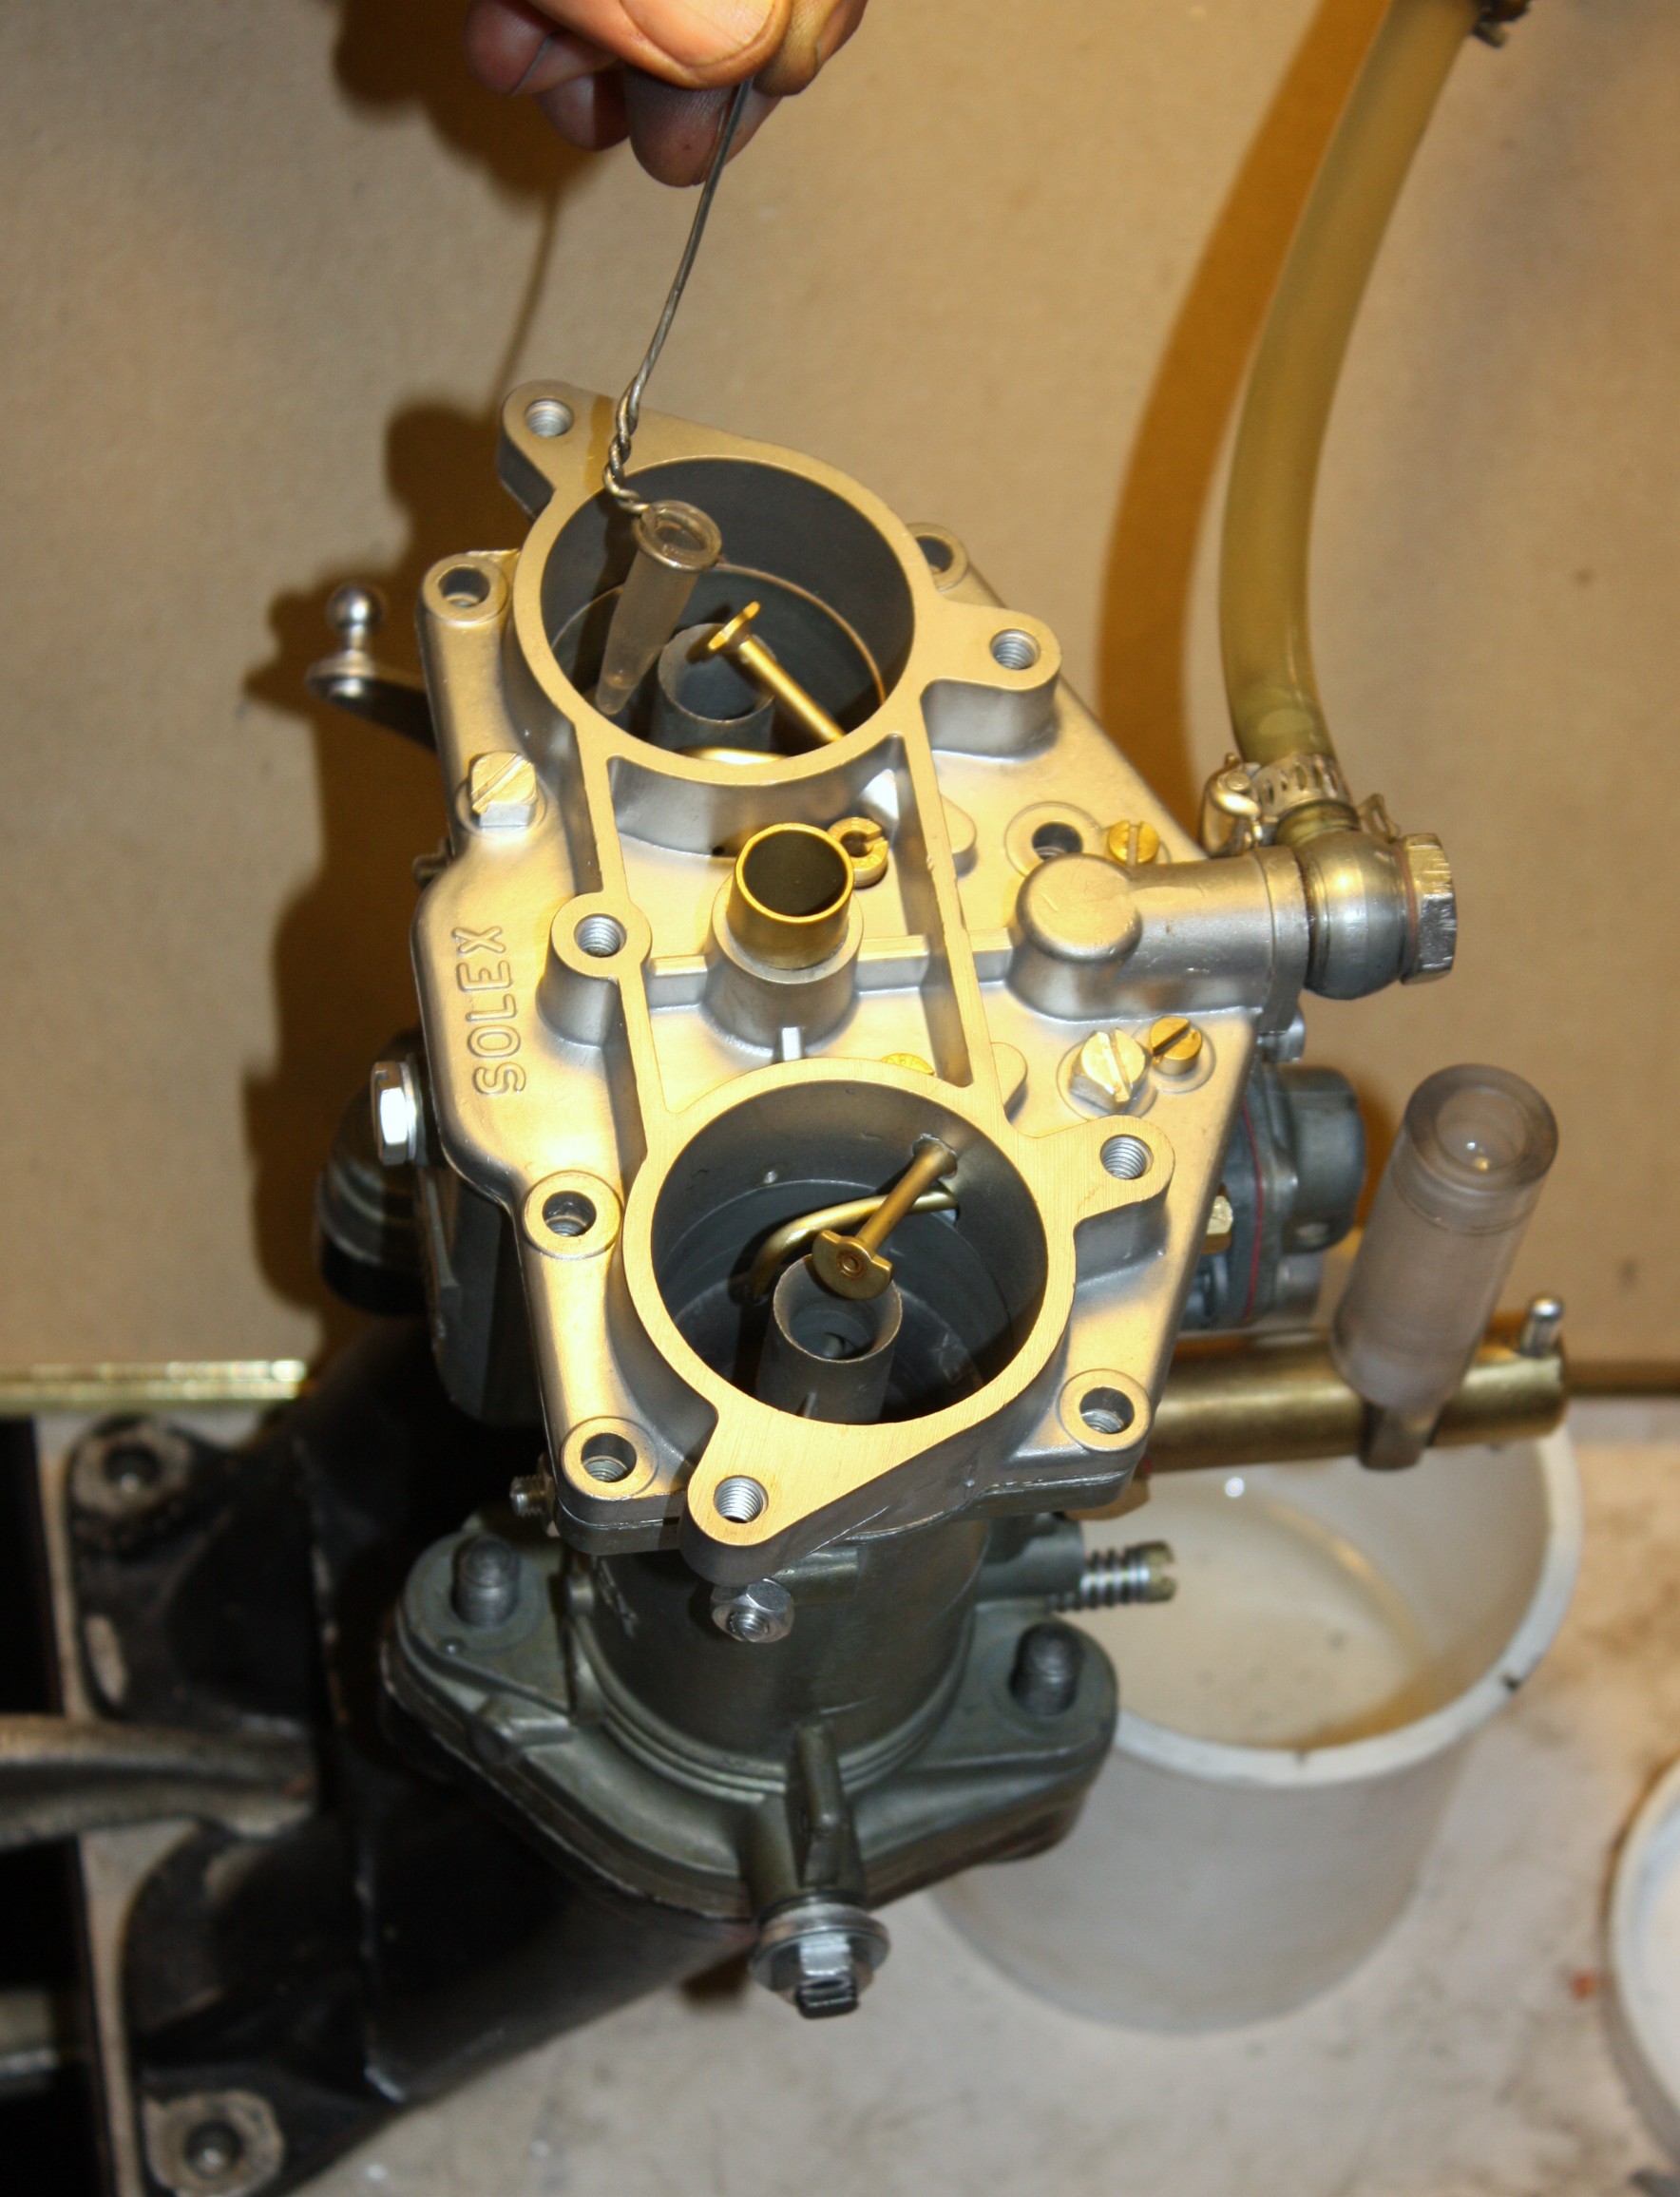
Using the Vials
Injection measurement vials were originally glass, and came with a little bit of wire that allowed the vial to be dipped under the injector in the carb. These glass vials are difficult to find. We were fortunate enough to find some plastic vials in the correct size. Add a bit of wire and measure your injection.
After attaching the wire, hold the vial under the injector and press the throttle lever twice, then read how much fuel is in the vial. If you are using the factory manual's guidelines, note that we have found the lower end of the original factory specs gives the best results with today's modern fuels.
Injection Specifications
| Carburetor | Injection Volume |
|---|---|
| Solex 40PII-4 | 0.35 ml |
| Solex 32PBIC / PBJ / 40PBIC | 0.50 ml |
Pump link/rod adjustment can fine-tune injection volume. See float setting instructions for pump rod adjustment details.
Duane Spencer — Performance Guide Excerpt
From "Porsche 356 Performance Guide" (2001) by Duane Spencer. Used with permission.
Accelerator Pump Settings (page 70)
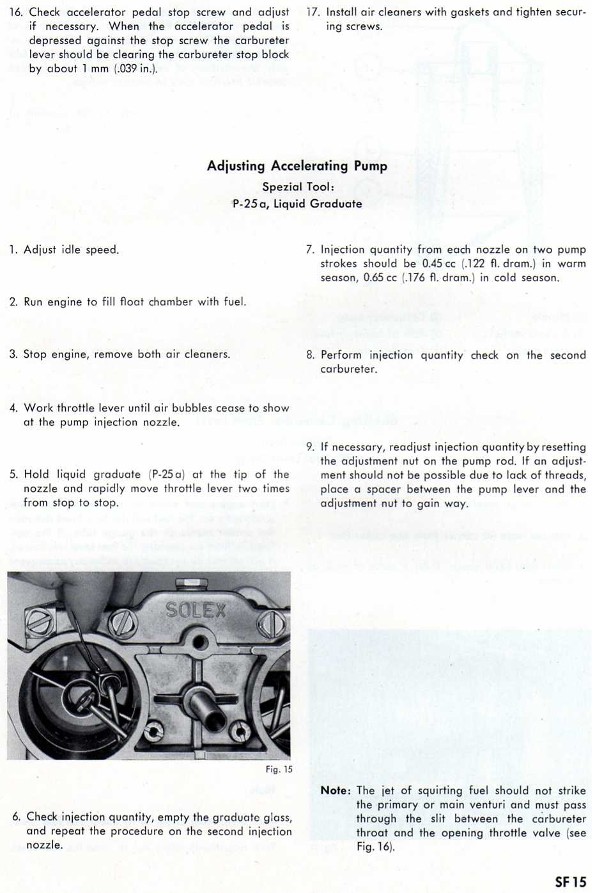
The accelerator pump injection quantity is easily set by adjusting the nut on the threaded rod. The manual suggests the following quantities for two strokes: in warm weather, 0.45cc, and in cold weather, 0.65cc — both of which are WAY TOO MUCH! With the changes in gasoline technology over the last thirty-five years, and to meet the ever more stringent emission requirements, today's fuel is entirely different. Spencer found the injection quantity needs to be set much lower than the factory setting, otherwise it just floods the engine with too much fuel. He shoots for about 0.1cc per stroke for a relatively stock or hot street engine, and about half that for an all-out race engine.
Alternative Method Without a Vial
If you do not have a vial for measuring the fuel injected quantity, you can use the following technique: unscrew the nut (counter clockwise) on the threaded rod until there is nothing coming out of the nozzle except a bubble when the throttle arm is put through a full stroke. Then, turn the nut in clockwise about 2.5 to 3 turns, install the lock nut and snug it down. It should pee for about one to one and a half seconds per stroke; if it lasts longer than that, cut it back some more. This should provide enough fuel quantity to get it started in the morning, hot or cold weather, without causing flat spots when accelerating. An added benefit is that it will improve the fuel mileage.
Setting Idle (page 72)
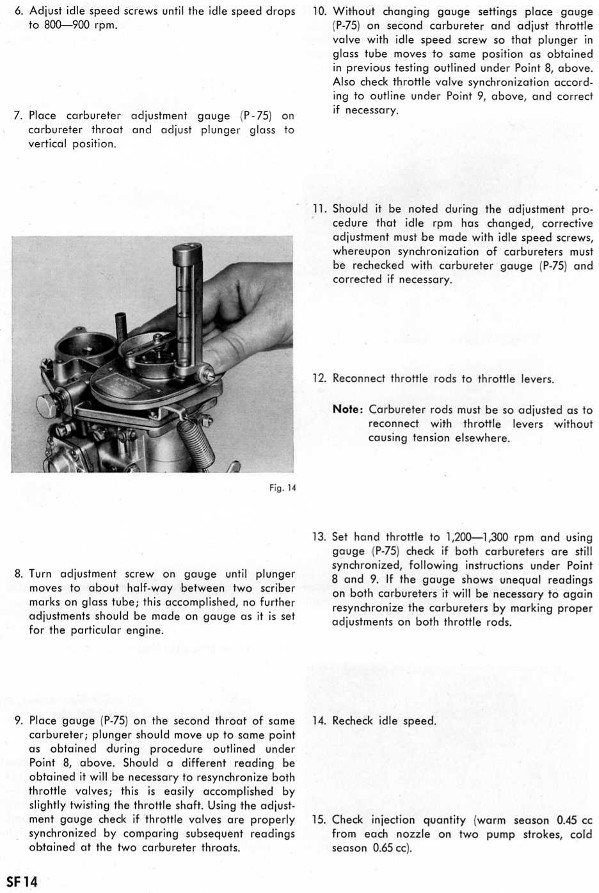
Solid shaft: Turn the idle speed screw back (counter clockwise) on each carb until the idle speed drops to around 900–1000 RPM. Check each throat with the Uni-syn to balance the flow through each side. Pop one of the vertical drop rods off of the throttle linkage so that it does not influence the other carb. Then, begin slowly turning in (clockwise) one of the idle mixture screws. The idle speed will generally begin to rise and then begin to drop. As soon as you detect this drop, stop and back the screw out until it is at its best idle speed. Go the next one and do the same. It may be necessary to go through this procedure several times until a smooth steady idle is achieved at around 900–1000 RPM. Reconnect the throttle drop rod and adjust it, if necessary, so that it does not influence the idle speed, then rev the engine a couple of times and observe how it comes back to idle.
Split shaft: Idle is controlled primarily by the mixture screws. Start by turning the idle speed screw out so that the butterflies are completely closed, then bring the speed screw up to the throttle arm so that it just touches the stop. Turn each idle mixture screw in as far as it will go, and back it out three complete turns. Balance the front-to-back throats on each carb using the little screw located under the float bowl. Then adjust the idle speed screws on the throttle arm to balance the carbs on each side. High idle hang is normal for split shafts (1,200–1,300 RPM settling gradually to 900 RPM). This is characteristic of the design — Spencer thinks it is an interaction between the carbs and the distributor advance. If it really bothers you, try using the clutch to pull it down to idle.
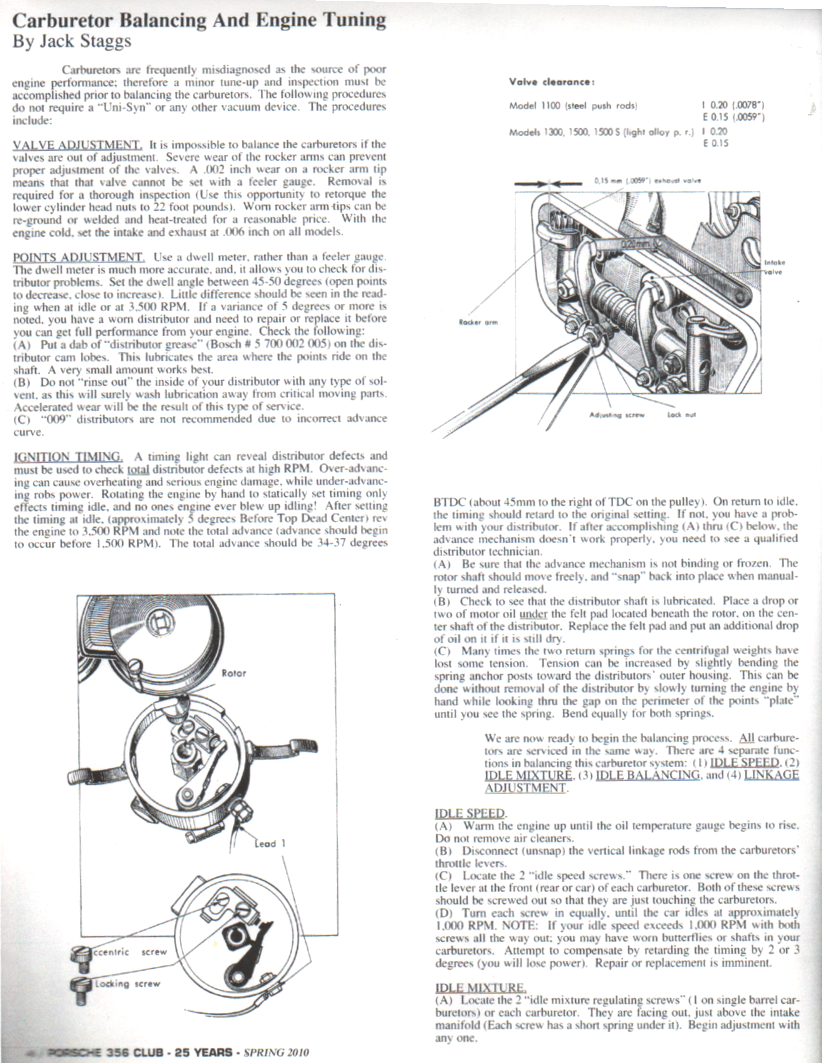
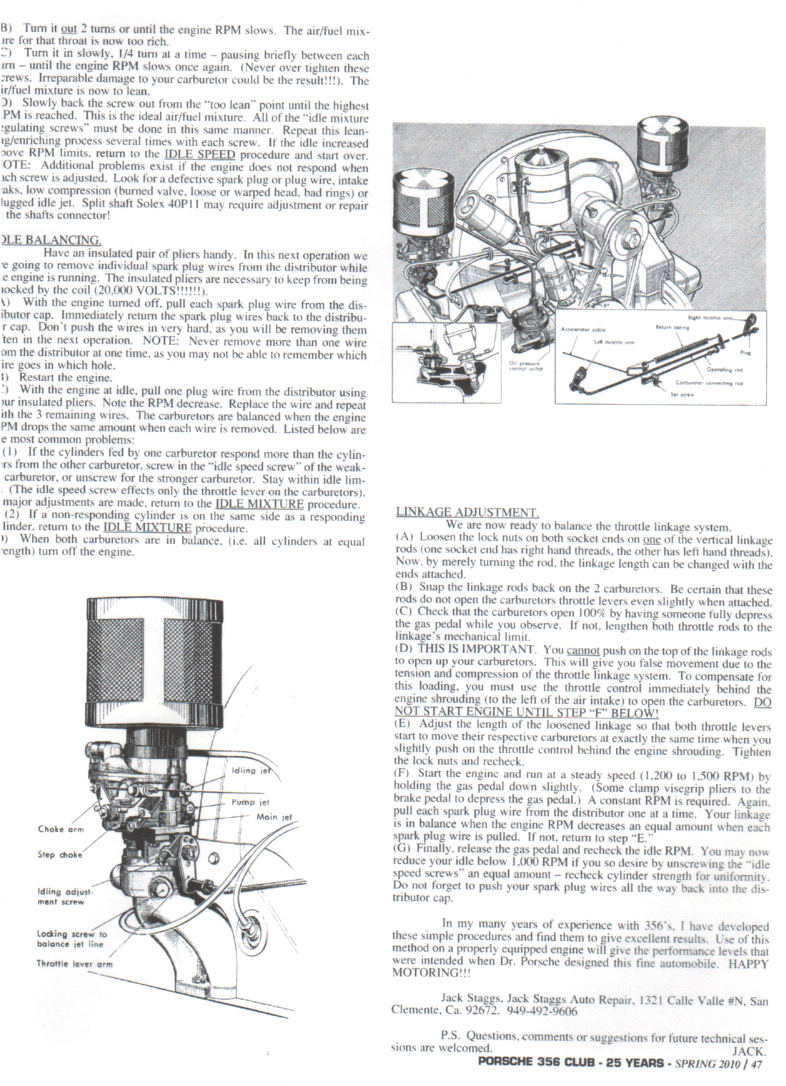
Jack Staggs — Carburetor Tuning Article
From the Porsche 356 Club magazine, Spring 2010. Used with permission.
Jack Staggs' two-page article covers carburetor balancing and engine tuning for the Porsche 356. Click the images below to view the full article.
You can also find more information on your carbs and engine in the PCA series of books Upfixin der Porsche and on the 356 Registry website.